In this guide, I show you how to choose who to pitch, how to find the right contact information, and how to craft a winning pitch.
PITCHING TO BRANDS AND IS THE BEST WAY TO GET YOUR IDEAL CLIENTS, AND YOU CAN DO IT WITHOUT FEELING ICKY
Gimme the Guide!
11 FOOD PHOTOGRAPHY DOCUMENTS EXPLAINED
Top Posts
11 PLACES TO SOURCE AFFORDABLE PHOTOGRAPHY PROPS AND BACKDROPS
30+ FOOD STYLING TIPS TO ELEVATE YOUR FOOD PHOTOGRAPHY
Free Resource
About Frenchly
I am a food + product photographer & educator specializing in eco-friendly and sustainable brands. When I am not working with clients, I empower creatives to start their journey by sharing my knowledge on the business of food + product photography.
Over 25 Food Photography Props you probably already have
April 29, 2019
It might seem overwhelming to add food photography props to the long list of equipment, software, backdrops, and education you’re already purchasing when starting a photography business. But it doesn’t have to be! Despite the fact that you don’t need super fancy equipment when you are just starting, you also don’t need to invest in expensive props right off the bat. In fact, you might just already own most of the food photography props you need. Don’t believe me? Check out the 25+ food photography props listed below. I guarantee you already own at least half of them.
1. Other Food and Ingredients
My favorite food photography ‘prop’, by far. Just adding other foods or the ingredients from the recipe you are photographing can be enough to create a great image. Choose fresh-looking ingredients with bright colors and experiment with placement and composition. (Check out my 30 food styling tips for inspiration.)

2. Simple Plates and Bowls
Everyday bowls and plates work very well for food photography, especially if they are white or off-white, made with some sort of ceramic or porcelain. I find matte plates much easier to work with and I love the modern, minimalist look they have. As much as possible, I try to stay away from busy patterns on the plates, as I find that it takes attention away from the food. As you become better with your food photography, you will probably want to buy dedicated dishes but to get started, what you already have is a great start.
3. Napkins
I LOVE to use napkins and fabrics in my food images. It brings movement, fluidity and and an extra touch of colors to the images. In this case again I would recommend staying away from busy patterns and sticking to plain colors. I prefer to use linen, as I find that it catches the light beautifully, but if you don’t have linen napkins, you can always pick up some at your local fabric store for a very reasonable price. Now, getting the fabric to do exactly what you want can be a real struggle (I am serious), so here are a few good tips to style the napkins.
4. Cutting Boards
I have a thing with cutting boards…so naturally I have quite a few. I find that they are really easy to use and are perfect to create a frame for food like avocado toasts, tartines, etc. They also add another layer between the backdrop and the food, and we know how important layers are in food photography.
5. Sauces and Dressings
This is a very easy way to add to your story: incorporate dressings or sauces that would naturally go with the food you are shooting. It will help the reader picture the taste of the food in his mind and add color and compositional elements to the image.
6. Tiny Bowls
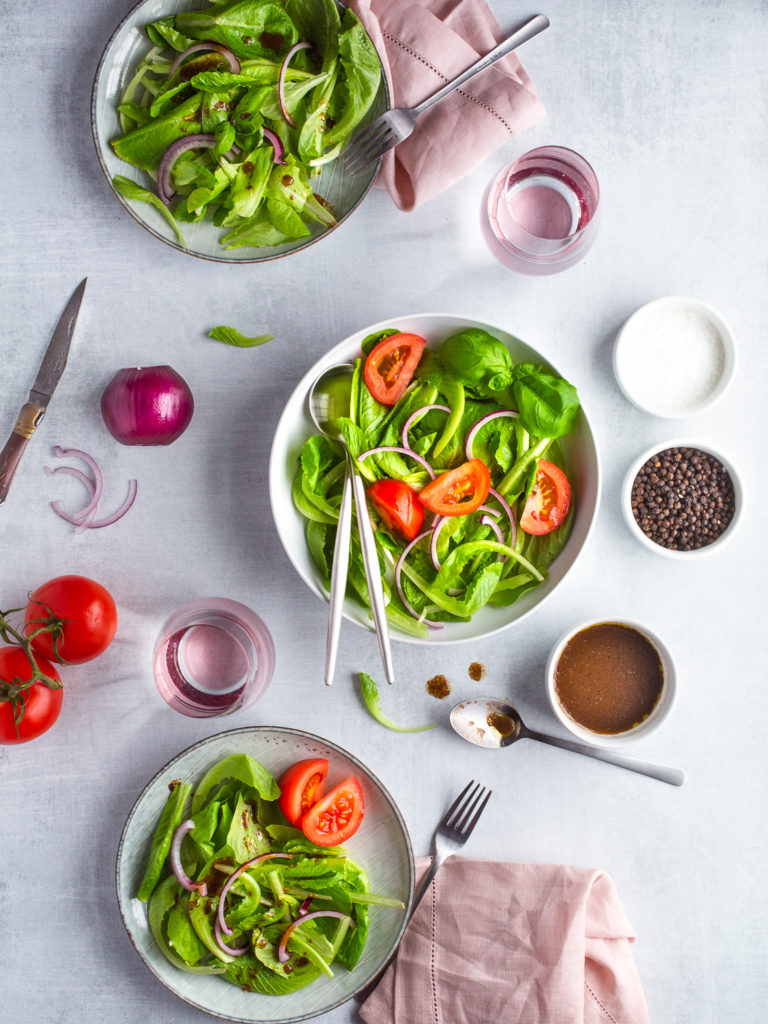
Now what are you going to put the dressing in? A tiny bowl of course! I actually used to have a lot in my kitchen to hold garlic, herbs, salt, etc. while I am cooking. Then somehow, they all made it to my food photography studio. I use them a lot as they are great props to add repetition to your composition.

Simple dishes and tiny bowls are a great way to create repetition without looking cluttered
7. Cutlery
Cutlery is a great food prop to add to your images. Not only does it add the idea of a human element (especially if a model’s hands are holding them), but it also helps define the feel of your image. Think about it: if you choose to use your grandma’s vintage silverware, your image will tell a very different story than if you decided to use your everyday ones. Start by using the ones you already own, and keep an eye out for interesting silverware next time you stop at an antique store.
8. Glasses and Mugs
Glasses and mugs are two of my favorite props to add to an image. They can add to your image in so many ways! First, by choosing what you add to them, you can really add a lot to the story. Try coffee for a breakfast shot, tea for an afternoon snack, water for a healthy meal, wine for a dinner in town, or a cocktail for a fancy date! You can even add garnishes in the drink to create yet another layer: lemon or lime slices in the water cup, rosemary, mint, or a sugar ring to your cocktails, the possibilities are endless! Finally — and this is my favorite thing to do — you can play with the light that shines through the glasses to create interesting patterns on your backdrop. All that, just with a glass!

Hard shadows and the light shining through glasses can be a prop, too.
9. Crumbs and Spills
I am definitely a photographer of the mess. Once I have found the composition of my image and I am happy with it, then I usually mix in a bunch of crumbs, spills and general messiness. I find that it adds a “lived-in” quality to the images and makes the viewer feel like somebody literally just finished preparing this dish.
10. Bottles
The same way that you would use glasses in your images, you can also use bottles to tell a story or create connections in the viewers mind. Think cookies and milk! Painting interestingly-shaped bottles an opaque color adds another layer of interest (and you can customize the color to your color scheme).
11. Measuring Cups and Spoons
Everybody has measuring cups and spoons. Add them to your images for a process shot or to showcase some of the ingredients you are using in the recipe. I usually stay away from plastic as I find it gives a cheap feel, but I have a lot of different sets. My favorites are stainless steel, rose gold, and black metal.
12. Mason / Le Parfait Jars
Great props to display smoothies, parfaits, or chia seed pudding, you can also use them to corral silverware, straws, or kitchen utensils in the background of your images. It lends a real kitchen feel. Plus, who doesn’t have at least 2 dozen Mason jars sitting around?(Or maybe that’s just me.)
13. Cooling Racks
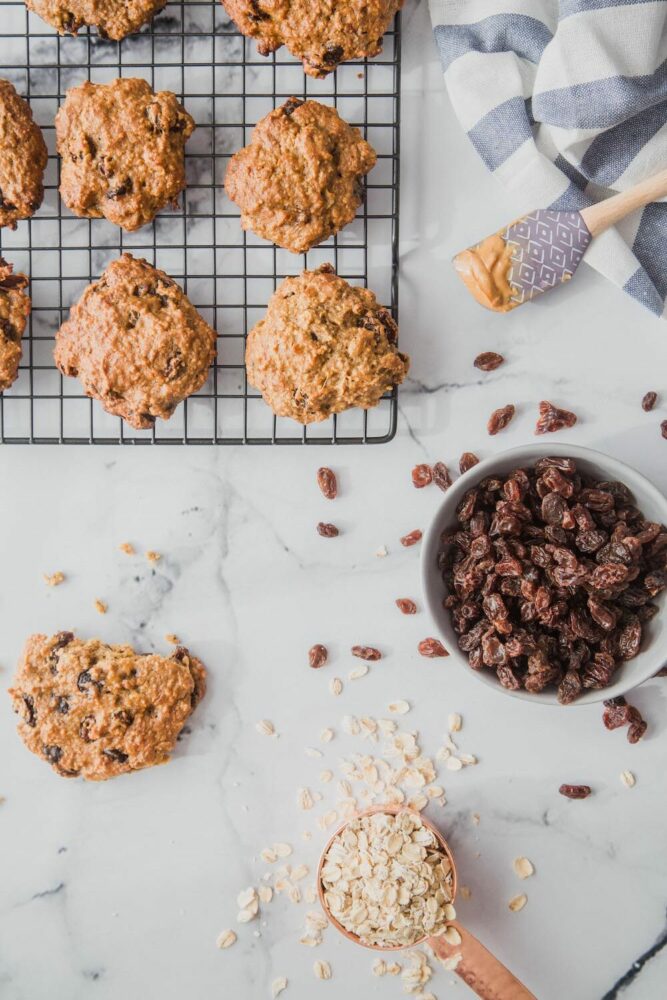
If you are shooting cookies, then your cooling rack is your best friend: it is just the perfect prop to display those yummy treats and create a feeling of ‘just out of the oven’. It also creates an opportunity to insert another layer (add a tea towel and a wooden spoon and you are golden) to provide an interesting frame for your subject!

I love to use cooling racks to add a layer and to frame my subject in cookie shots.
14. Paper Straws
Although I don’t use plastic or paper straws in my personal life (as a personal quest to reduce waste) I do use (and reuse) them a lot in my food photography. They add color, leading lines, and a festive touch to your images.
15. Cast Iron Skillets and Dutch Ovens
Yes! I love to include these in my images! They give a rustic, homemade, family heirloom (Yes, all that!) feel to the images. They also usually bring back memories to your viewers and therefore create emotions, which is exactly what we want. I tend to think that the older and more beat up the better. I always keep an eye out for them at antique stores.
16. Baking Trays or Muffin Tins
If you have ever searched Pinterest for ‘cheap food photography backdrops’, then you know that we all swear by old baking trays, the more texture and burnt grease the better. You might have one that is just perfect in your baking drawer, or you might want to keep an eye out for one in…wait for it…antique stores, of course!
17. Sprinkles, and Other Baking Supplies
If you are photographing baked goods, chances are you already have all the props you need. You can use sprinkles, muffin tins, piping bags, and powdered sugar to add interesting elements to your image. All that with props you already own!
18. Depression Glass
Okay, who doesn’t have a box of depression glass in their basement that their mom (mother-in-law in my case) has been collecting and wanted to pass on? No-one? Well, I do, and I love to use them to add colorful, creative reflections on my backdrop (see #8) and a little nostalgia to my images. And if you don’t have any, well, you know where to go to find some 🙂
19. Serving Trays
I use serving trays a lot in my house to carry things, group items, or create small vignettes. They come in an infinity of shapes, sizes, materials, colors (And prices!). And therefore, I use them a lot in my photography. They are ideal to add layers to your images, group items together, and add color, repetition, and framing your subject.

Adding a small tray can help frame your subject and create repetition.
20. Twine
I love using twine in my images. I find that it gives a farmstead, homemade feel that goes well with my style. It also very effectively adds movement in your images and can be used to create leading lines and direct your viewer’s eye to the main focus of the image.
21. Seasonal Decorations
I know you have a whole box of Christmas decorations in your basement… What? You have three? Okay, I am guilty too. So next time you shoot that perfect Christmas cookie recipe, make sure you include cookie cutters, maybe some Christmas themed ribbons, or a branch of Christmas tree! You can adapt this tip to all your seasonal images. In the fall, pumpkins, colorful leaves from your yard, straw; fresh flowers, pastel napkins, and tableware for Easter, etc!
22. Teapot & Teacups
Adding a teapot and teacups in the background of your baking shots is a great way to add to the overall story you are telling. They can also add color and a certain type of feel to the shot, depending on whether you are using a vintage set, or a sleek, modern one.
23. Salt, Pepper, Spices
Another thing to add in your tiny bowls (#6)! A lot of spices are very colorful (think curry, paprika, cardamom) or have interesting shapes (star anise, cloves, cinnamon), so don’t hesitate to use them in your food photos to add color, texture, and a bit of exotic flair.
24. Coasters
I love to use coasters in my images, most of the time under the glasses, but sometimes as tiny little trays for garnishes or lemon slices. I have a few sets that I bought or were gifted to me and I use them to create layers and texture. There are so many different types of coasters: marble, stone, ceramic, and even cork. Most of them are very inexpensive.
25. Vintage Dishware from your Grandma
Most of us have a pile of vintage dishes or cooking utensils in a box under the stairs. I don’t typically use the plates a lot because they don’t necessarily fit my style, but I do love to use old cheese graters, colanders, tea strainers, and of course all the silverware. They must be used sparingly though (unless you are going for an all vintage look) and must match with the rest of the image!
26. Cooking Utensils
Your kitchen drawers are full of food prop treasures like whisks, rolling pins, wooden spoons, and serving spoons. Go explore your drawer! You will be surprised how many of those you use every day and never even thought about as potential props.
27. Hands
Yes, hands! You always have them with you. Including them in your images is the best way to create movement and life to your images. Obviously you will need to shoot using a tripod (which you should anyway). You might need to practice a bit before you can get the perfect shot, but you can get some great results! If you are up for an adventure, you can even stitch several images together to create busy food scenes using Photoshop composites.
I hope this article has helped you realize that you already have most of the props you need to get started with your food photography journey! If you need a little help to set up your first shoot, head over to my food photography workflow quick guide and tag me on Instagram @frenchlyphotography with your food photos!
Leave a Reply Cancel reply
| Created with Showit
| Design by Oregon Lane Studio
| Privacy Policy
© 2020 Frenchly Photography
Back to Top
THE WEBSITE
THE BLOG
Helping brands and businesses promote a happy, healthy and sustainable lifestyle through stunning food and product photography

[…] Food just looks better when there’s a small amount of carefully-chosen pieces, as opposed to a mound of food. They will, however, look quite lost if you use regular-sized dinner plates, so make sure to use salad plates and small bowls. When styling food, smaller props in general work best. For ideas about this, check out my post about 25 food photography props that you probably already own. […]
[…] quick trip to the store, no biggie. You finish your recipe and start styling your set. Hmm… that plate doesn’t quite work, you need to use the other one, which is too big for the amount of food you […]
Hi
I have a question,
I want to order a Flower product from your webshop.
but i can’t find it. anymore on your site,
it looks like this picture on this site http://bit.ly/FlowerProduct542
Mail me if you are going to sell it again.
I’ll wait.
Yours sincerely
“Sent from my iPhone”
[…] to shoot product photography, food photography props found in thrift stores or my own kitchen. You probably already own most of what you need for the first few projects! And today, I have invested in a lot of […]
[…] {Psst! To find more ideas for props you may already have, check out this blog post!} […]