In this guide, I show you how to choose who to pitch, how to find the right contact information, and how to craft a winning pitch.
PITCHING TO BRANDS AND IS THE BEST WAY TO GET YOUR IDEAL CLIENTS, AND YOU CAN DO IT WITHOUT FEELING ICKY
Gimme the Guide!
11 FOOD PHOTOGRAPHY DOCUMENTS EXPLAINED
Top Posts
11 PLACES TO SOURCE AFFORDABLE PHOTOGRAPHY PROPS AND BACKDROPS
30+ FOOD STYLING TIPS TO ELEVATE YOUR FOOD PHOTOGRAPHY
Free Resource
About Frenchly
I am a food + product photographer & educator specializing in eco-friendly and sustainable brands. When I am not working with clients, I empower creatives to start their journey by sharing my knowledge on the business of food + product photography.
4 Hacks to Maximize your Instagram Content from One Shoot
March 3, 2020
Please note – some of these are affiliate links, which means I’ll make a small portion of the profit if you purchase something, at no extra cost to you! Thanks for supporting us!
I get it. Instagram content creation takes a lot of time and can feel overwhelming. You already spend a lot of hours working on client shoots, editing or doing other admin duties, so finding time to create additional Instagram content seems impossible. This is why I wanted to share with you a few tips that help me make the most of my content creation shoots, so I can get a lot of unique Instagram content out of one single photoshoot.
The idea is to get as many images as possible on one photoshoot so you don’t have to shoot as often and constantly stress about it. By creating multiple images for each photo shoot, you can start building an image library to draw from in the future. Once you have completed several shoots, you will have a library of different subjects in different settings. You can then start using them to plan your Instagram content. When you’re writing a blog post about backlighting, you can just jump into that library and find examples without having to set up an entire shoot dedicated to that post. If you are contributing to another blog as a guest, and you need images, you can just dig into your library. Also, you can sell those images through a stock company and bring in another stream of income into your business. One last thing: when it comes to Instagram, you need to remember that your followers only see a fraction of your posts. So you can repost some images you have posted before. For most of your followers, it will be the first time they see it.
Plan your Instagram content creation days ahead of time
To get different images from a single shoot, it’s best to start with a plan. on the day of the shoot, you may be stressed, tired, or just not very creative. Having some ready-to-go ideas, will help you optmize your shoot, and allow you to get a few easy bonus shots. This doesn’t mean you’re locking yourself into anything! You can always improvise as you go, but things go more smoothly with an idea bank to draw from.
A secret Pinterest board is great for this. You can save examples of different styling and vantage points that jump out at you around the web. Then, when you’re trying to find extra shots you can create from a setup you’re using, all you have to do is pull up Pinterest and take a quick scroll! I personally use Bublup because it allows me to save my screenshots, as well as content from both Pinterest and Instagram. Whatever you choose, make sure it’s something you’ll use consistently. Otherwise, what’s the point?
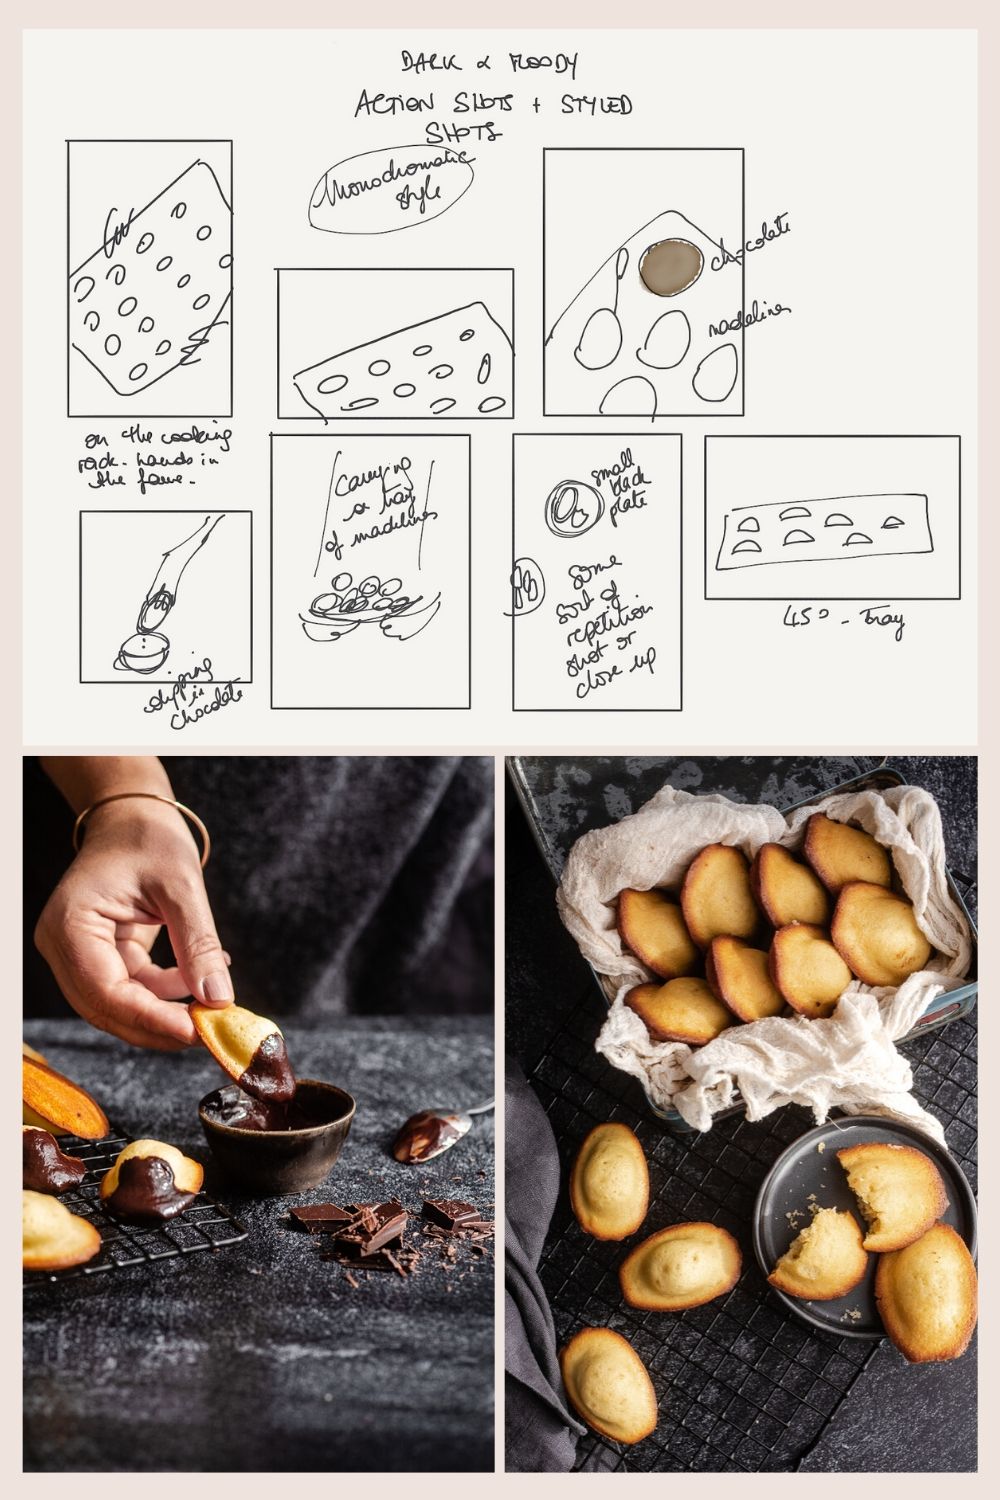
Finally I like to sketch my shot ideas before to help me remember the shots I had planned to take.

I always use sketches when I plan a photoshoot. It allows to keep track of the compositions I want to shoot.
Recreate your styling on a different backdrop
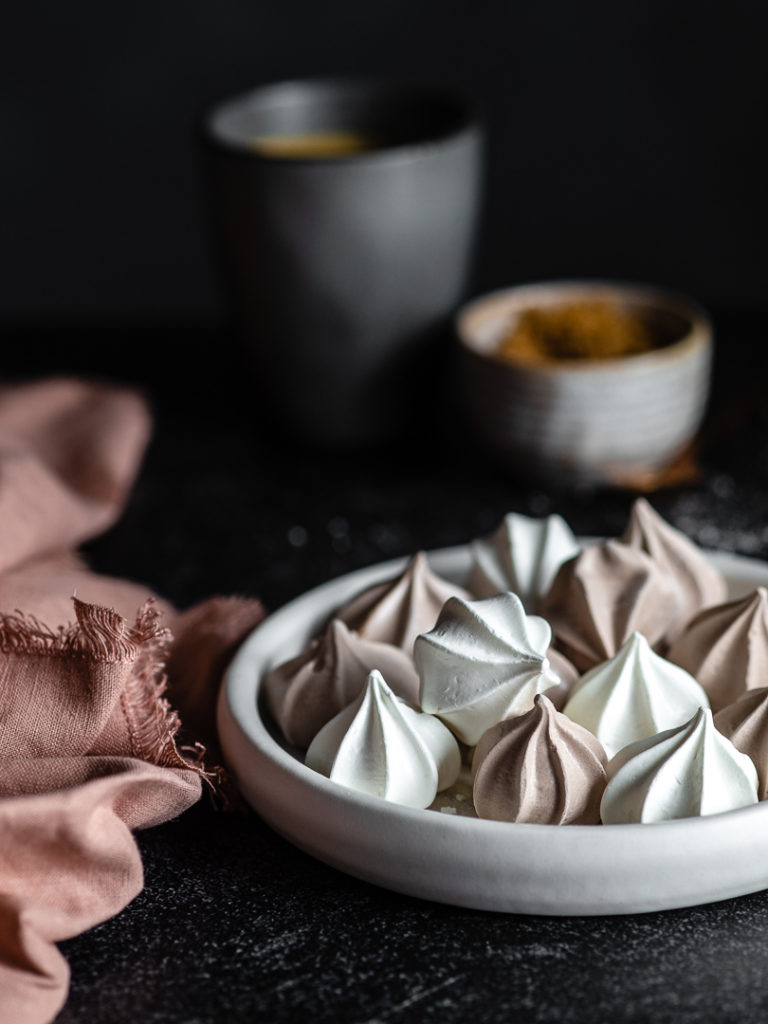
It’s a lot easier to repurpose a shoot when you’ve already got the ingredients out and the styling ready, than to start from scratch on a different day. Work with what you’re already using before you bring in a bunch of extra stuff! Leave your styling exactly the same, then change out the backdrop to make different parts of your composition pop. It can be fun to experiment with different colors and textures and observe how they interact with your original look. {This is where a working knowledge of color theory comes in handy…Canva has a great color tool to help with this.}


Flay lays are a little more challenging, because your food is basically sitting on top of your backdrop. However, moving your still life from one table to another is the work of a few minutes. Your setup is easiest to recreate when it’s fresh on your mind and everything is gathered.
Maximize each setup
Shooting the same scene in different ways sounds pretty common sense, but when you’re on the spot, sometimes those creative thoughts come to a screeching halt. These basic tips that will help you make the most out of every setup and build your image library more quickly:
- Photograph your backdrop and some props without the hero food. Images like this are popular with stock sites because their customers can add text and customize the negative space.
- Shoot from different angles. For example, if you’ve got an elaborate flat lay, look for different elements that would work well in a series of straight-on closeups. You can easily get another handful of shots this way in less than five minutes!
- Take photos throughout the shoot, even when you don’t have the perfect scene. You probably set the table before placing the food, right? There’s one interesting shot in the bag! After you get “the shot”, take a bite, {Or a few bites…sometimes I’m really hungry, okay???} replace the food, and get another shot. When everything’s gone {and you’re no longer hangry}, get a crumb photo!
- Change up your colors. Mix up your napkins or swap out the silverware with something rose gold. Small details can change everything!
- Shoot wide {and at a very high resolution} at least once from above and once at eye level. That way, you can strategically crop multiple images from those shots, if you want.
For example, I planned my Thai Green Curry shoot to make sure I could get different angles of the hero food: overhead, 45 degree and close up. But I also made sure to plan some shots of the ingredients one by one, styled together and in a process shot to make sure I would create a variety of images in order to maximize the number of unique shots I was getting from one single shoot:
 .
. 
Experiment with different lighting in the same shoot
The angle and sharpness of your lighting can completely change a shot. A bright, evenly diffused shot of a bowl of strawberries says freshness and springtime. A moody, backlit shot of the exact same bowl might bring up thoughts of something completely different. If you look at the Thai Green Curry shots above, you will notice that I have some moody shots, some bright and airy shots and even a couple with some hard light!
Play around, remove your diffuser, add or move your bounce, flag you light source or maybe maybe do some adjustment brush magic in Lightroom. And remember, of course, if you walk around to the other side of the table, the light hits everything differently.
A quick note about managing your Instagram content:
Now, the tips in this blog post are not going to be so useful if you just end up with a huge cyber-pit of images, right? It’s not going to do you a lot of good to create all these beautiful photos when you’re having to sift through hundreds of them to find the one you want every time.
That’s why your image library needs to be searchable. Add captions, titles, labels, and/or keywords to those files wherever you store them. This is simple to do in the Library module of Lightroom {look for “Keywording” and “Metadata”} or you can do it directly from the folder itself on your computer. Just do it in a way you’ll be able to use efficiently, long term!
Now you see how easy it is to build an image library with a few photoshoot extras, and why it’s such a useful habit to develop! It may seem like a hassle at first, but as you build your library, you’ll realize how much time it saves you in the long run. And as with any new way of doing things, it will take more time and energy the first few times you implement this strategy. As the process becomes more familiar, it will seem second nature and require only a few extra minutes of your time here and there.
For more tips about photography and small business life, make sure you’re subscribed to my email list! You can also find me on Instagram, where I share behind-the-scenes content and other helpful tidbits.

Leave a Reply Cancel reply
| Created with Showit
| Design by Oregon Lane Studio
| Privacy Policy
© 2020 Frenchly Photography
Back to Top
THE WEBSITE
THE BLOG
Helping brands and businesses promote a happy, healthy and sustainable lifestyle through stunning food and product photography